It is always a good thing to have good ventilation in a van, even when it’s raining. Especially if it’s raining when the weather is warm and muggy. And that was one thing we had a problem with during our recent summer in the Midwest.
We have MotionWindows in our van, which we love – these operate with minimal moving parts and they slide wide open, offering very good cross-ventilation. Only problem is, when it rains, we get a fair amount of moisture inside the van.
So that’s why we made these simple rain guards – they let the air keep coming in and they keep the water out.
They are made from 1/8” clear plexiglass sheet. We used a heat gun to bend them into shape and then drilled holes for suction cups to attach them to the van.
Here’s what we did and how you can do it yourself:
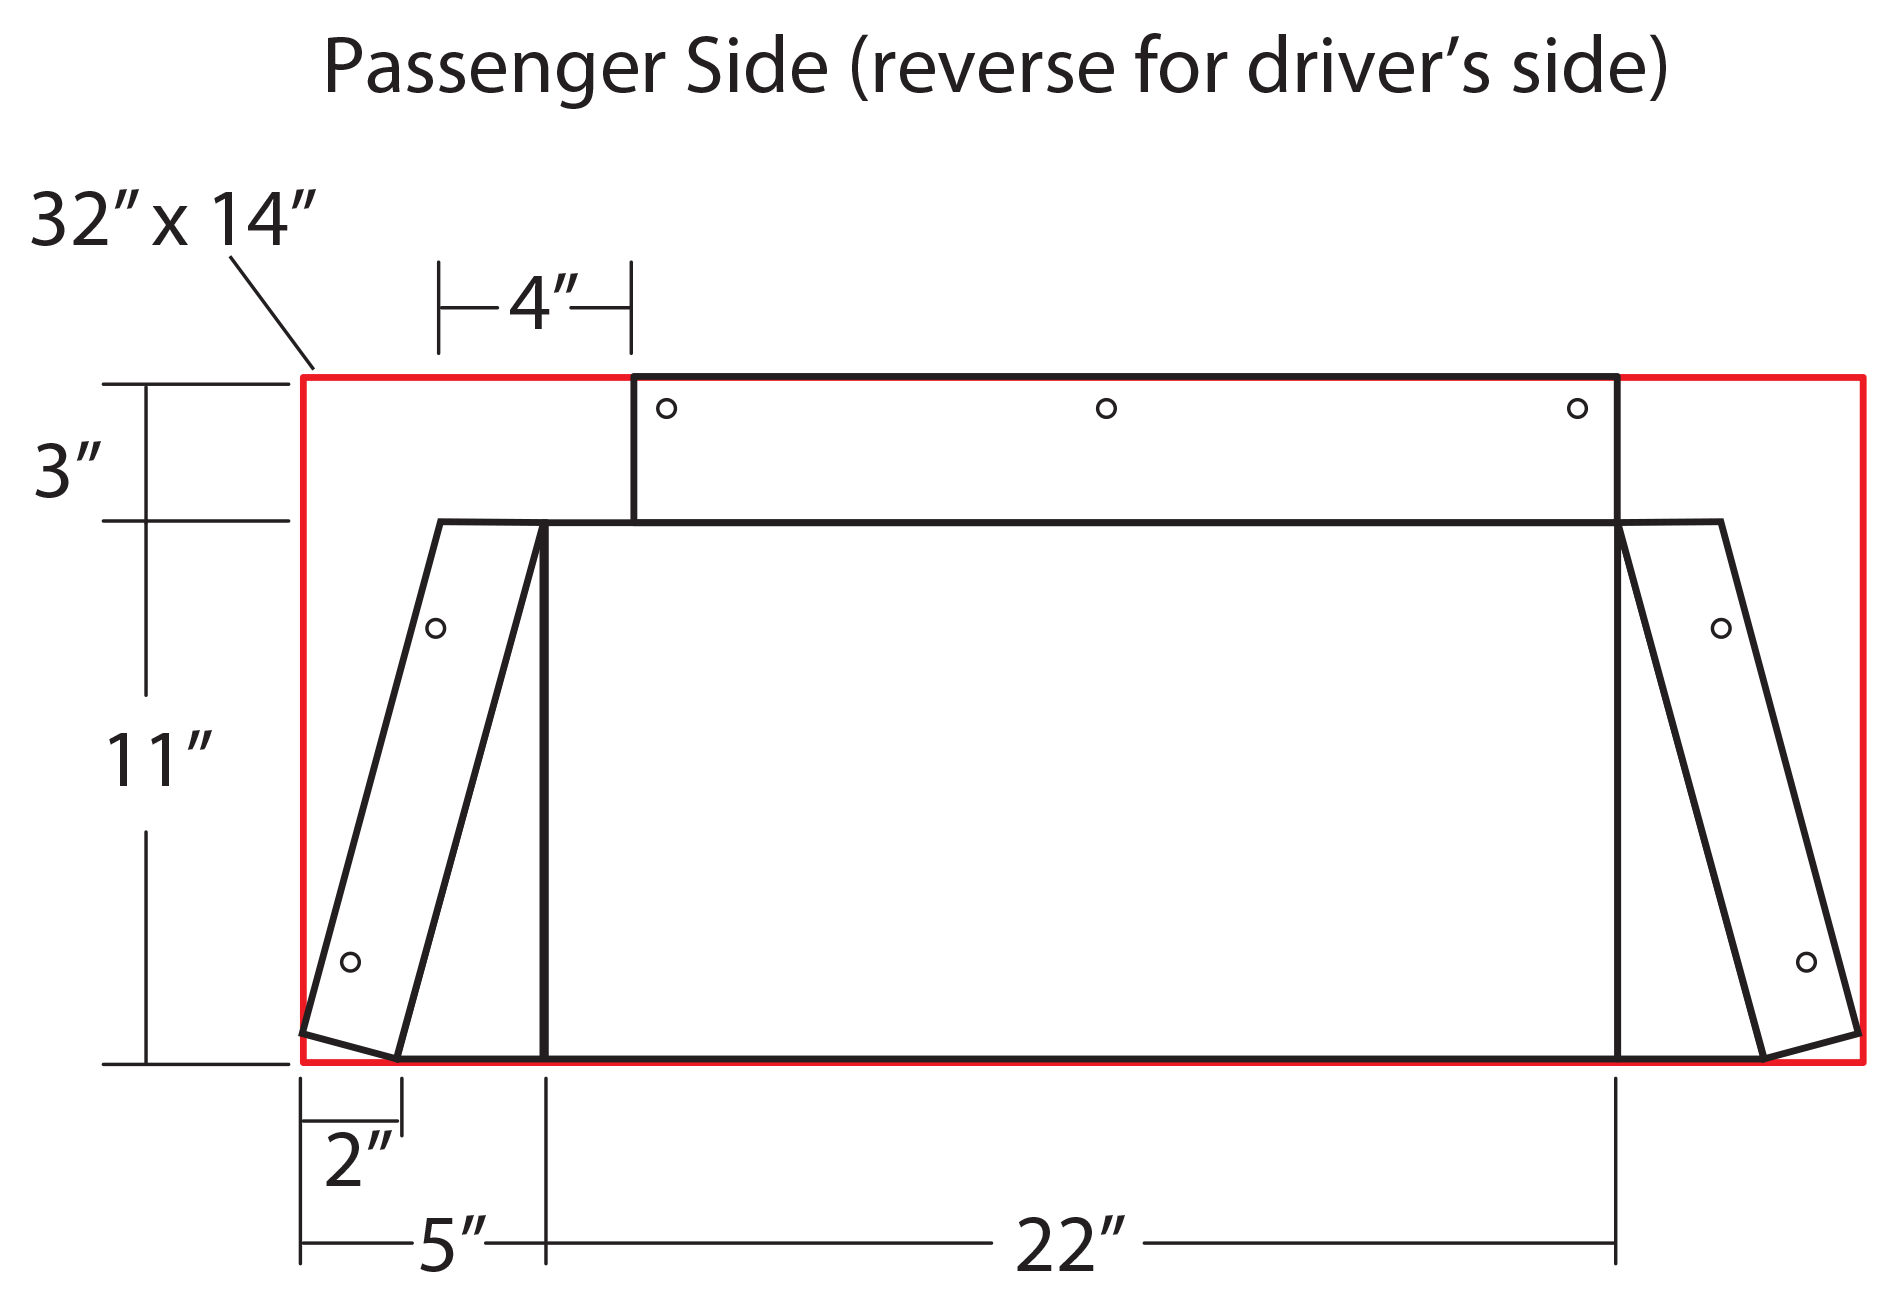
- Determine how large of a shield you will need. We simply measured the open part of our windows and added a few inches on the top and the sides for the mounting. See the drawing below.
- Then, we cut the sheet plexiglass to size using a plastic cutter with a cardboard template made from our rough drawing.
- Next, we drilled holes for the suction cups and the 90 degree cuts. For this, we used a special drill bit designed for drilling plexiglass. (see link below)
- Finally, the fun part – using the heat gun we bent the rain shields into their final form.
- Then, we popped the suction cups in and voila – rain shields!
Check out our video guide to see how it was done.
Here’s the rough template we used which you can use as a plan for your own
And here’s a list of tools and supplies and links for where to get them:
This post contains affiliate links. We may earn compensation when you click on the links at no additional cost to you.
| ScoreMate Plastic Cutter | https://amzn.to/3nOIzm6 |
| Suction Cups | https://amzn.to/351cyie |
| Plexiglass Sheet | https://bit.ly/2IwQLHv |
| Plastic Drill Bit 7/16″ | https://amzn.to/3nUjXs5 |
| Heat Gun | https://amzn.to/3lRIaxo |
We also used C-clamps, a framing square, some scraps of plywood, and a Sharpie for marking the cuts. Note that you can use a sanding block if you don’t have access to a disc sander.
If you do this, have fun and let us know if you have any questions or comments.