Adding solar panels and the requisite electronics to your van’s electrical system is such a huge game changer. It extends your range when you are traveling off-grid and adds days to your adventure. This is because you don’t need to worry as much about keeping your batteries charged up (when you’re in an area with plenty of sun, of course).
We lived for the first 6 months in our camper van without solar panels, and when we finally installed them, the world opened up to us. Here’s how we did it:
Be sure to watch the video below help clarify how we put all this together.
(Note: This post contains affiliate links. We may earn compensation when you click on the links at no additional cost to you.)
80/20 is Your Friend
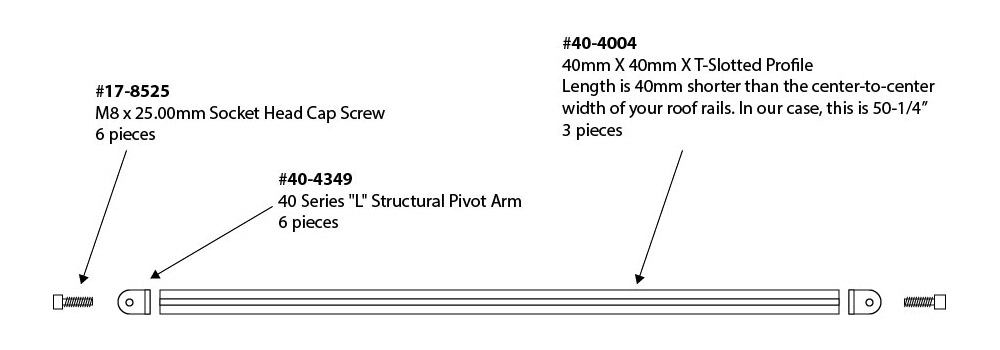
We ordered the main mounting hardware from 80/20 products online. 80/20 makes many variations of extruded aluminum products and lots of hardware and gadgets to go with it. We used their 40-series to make three cross-bars to mount the solar panels. The cross bars were tapped at each end (meaning, threads were added so bolts could screw into to them) so we could connect Pivot Arms (what I refer to as “risers” in the video.)
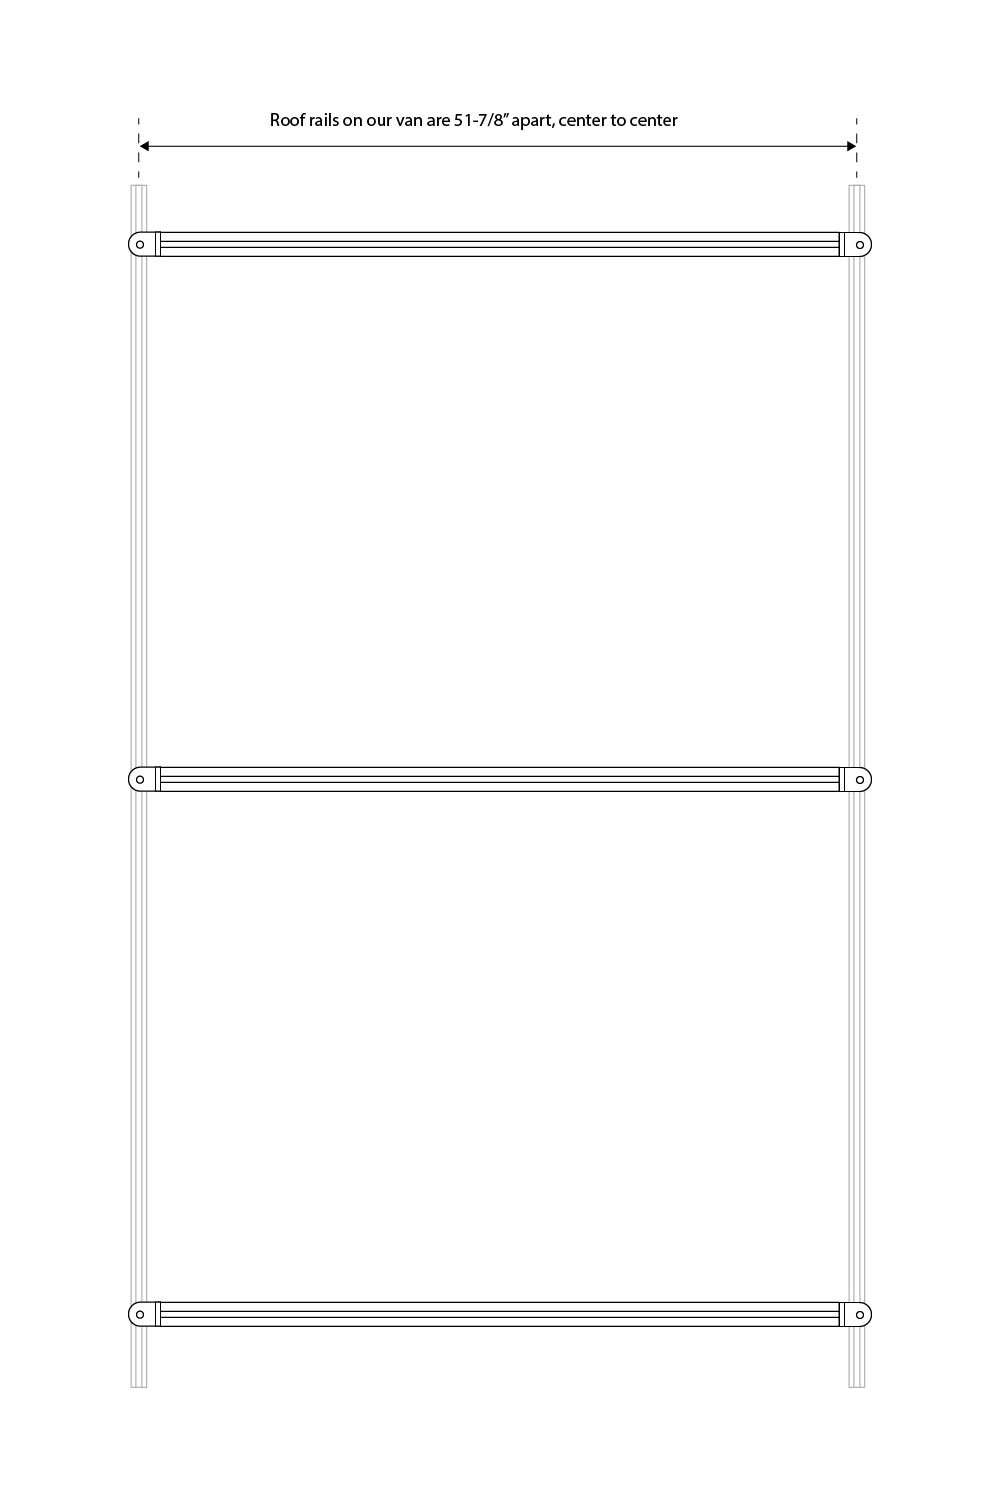
Then, we used stainless steel drop-in studs (dropped into our van’s roof rails) to attach the Pivot Arms to the van. Easy peasy.
Solar Panels Mounted
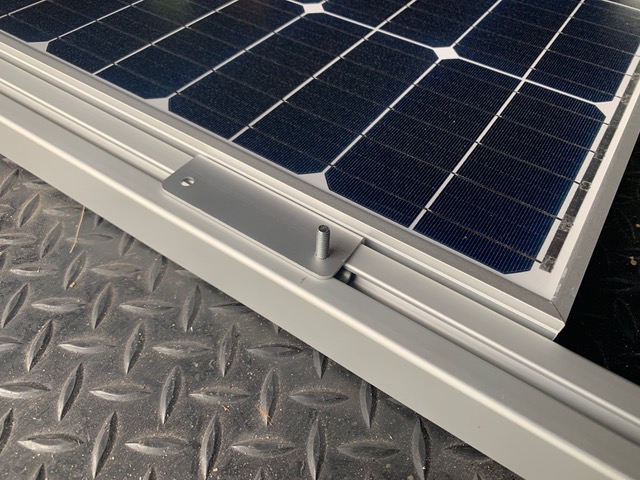
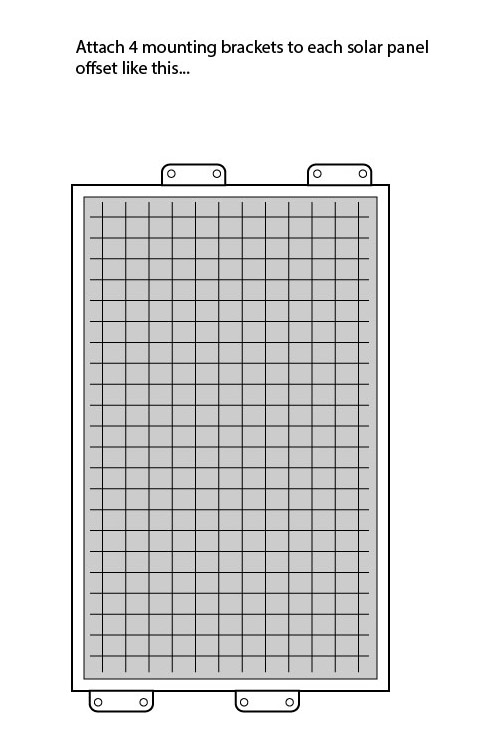
Now that we had three sturdy cross bars, we attached mounting brackets to our solar panels and bolted them to the cross bars using these slide in studs (in the photo below). 80/20 does make drop-in studs for this application too but I had ordered the wrong ones by accident and we were running out of time, so I made my own using these Slide-in T-nuts, and these Button head cap screws. I put them together using Loctite® Permanent Thread Locker so they won’t come apart. When those 2 parts are assembled, they look like this:
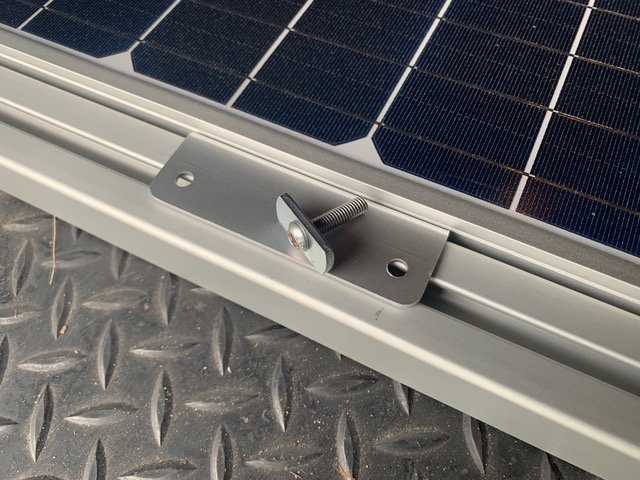
And they fit like this:
Then we connected the wires from the 4 solar panels in series and the installation was complete.
Here’s the step-by-step
1. Assemble the crossbar assembly by using Pivot Arms bolted to the cross bar with cap screws. Make 3 of these
2. Attach 3 cross bar assemblies to the roof rails at the correct distance apart for your solar panels to fit in between them.
3. Put the mounting brackets on your solar panels
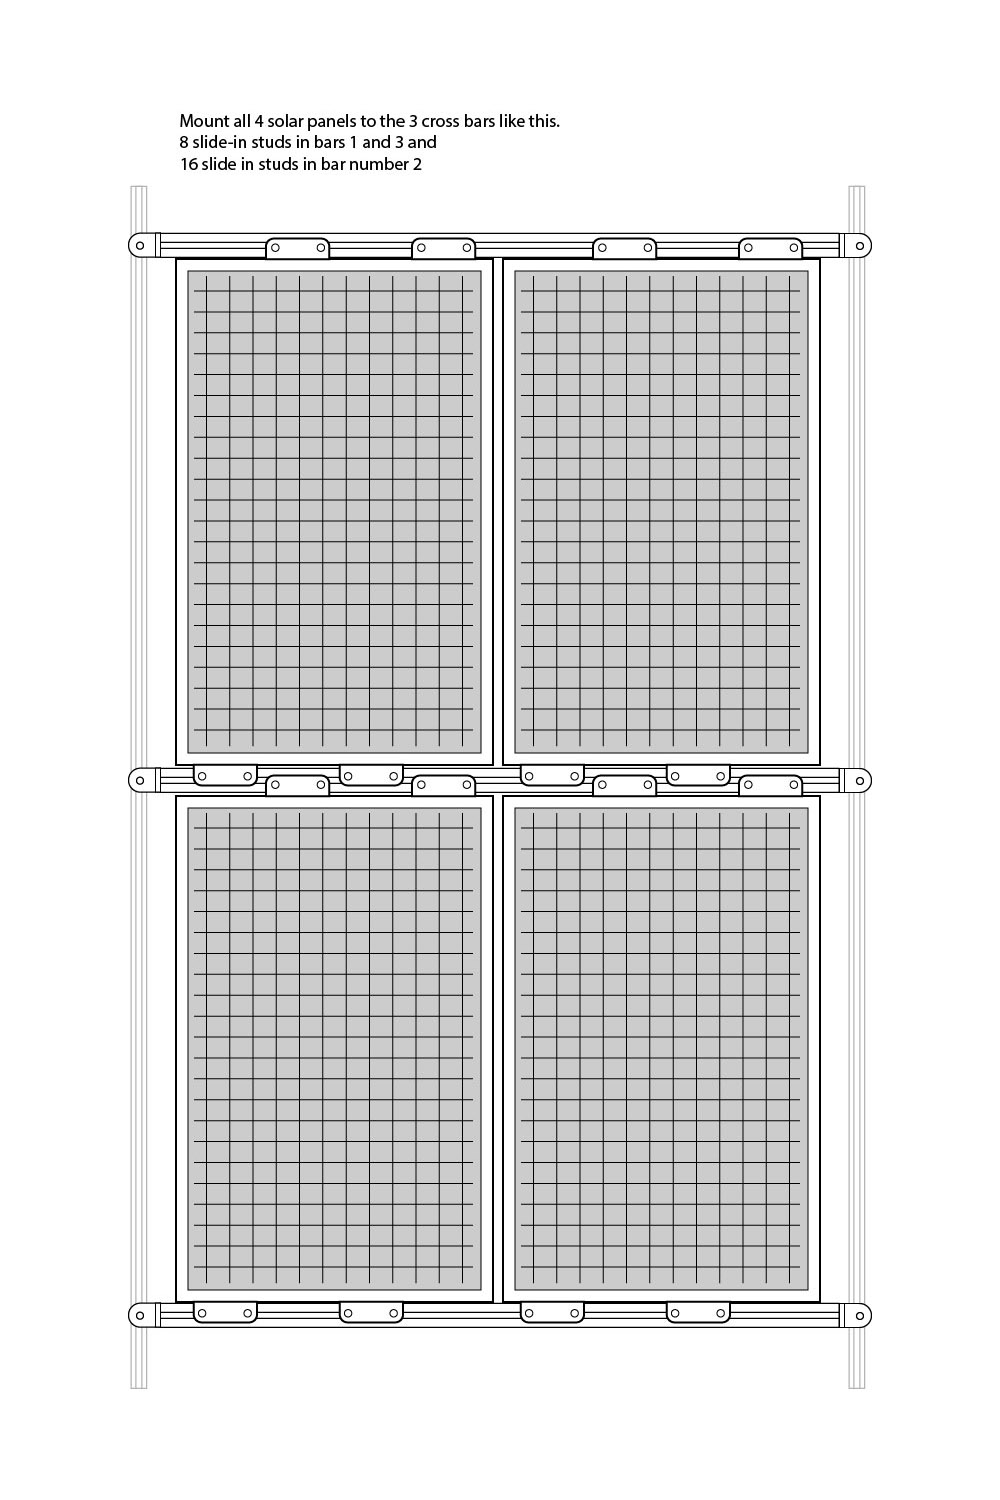
4. And finally, mount all four solar panels, being sure to connect the wires in series (if that’s how your system is being set up). We used Self-adhesive cable tie mounts to hold the wires in place:
Once everything is in place, run your wires from the roof down to your electrical system. We used about 14 feet of 10-gauge, copper stranded solar wire each for both Positive and Negative from Renogy.com. It went through a Roof Entry Gland where it went through the roof. This was sealed in place with Dicor Lap Sealant.
Here is the video showing how it all went together and below that, a list of all the components we used:
Crossbar assemblies
(note – all measurements are taken from our install based on the position of our roof rails. You should measure yours before cutting anything)
#40-4004 3 pieces at 50-1/4″ length
Risers (pivot arms):
#40-4349 6 pieces
Cap Screws
#17-8525 6 pieces
Drop-in Studs and lock nuts (to mount cross bars to roof rails)
#13170 6 pieces
M8 x 1.25 Nylon Insert Hex Nuts
Solar Panels 4 pieces
Solar Panel Mounting Brackets 2 sets
Slide in T-nut assemblies (to mount the solar panels to the cross bars)
#40-1961 T-nuts, 32 pieces
#19-6325 Button-head cap screws, 32 pieces
M6 x 1.0 Nylon Insert Hex Nuts
Self-Adhesive Cable Tie Mounts
Loctite® Permanent Thread Locker
and to get up on the roof, a Collapsible Ladder!
* * *
If you have questions, leave a comment or shoot us an email. We look forward to hearing from you.
1 thought on “Installing Roof Solar Panels on our DIY Camper Van”
Pingback: 9 Things We've Learned So Far as Newbies in Alaska - Tim & Shannon L.T.D.